DSL Setup – Windows NT 4.0
The following are step-by-step instructions for configuring your DSL connection in Windows NT 4.0 for the Access US network. If you have any questions or difficulties, please feel free to contact Technical Support.
Skip to Step
1 | 2 | 3 | 4 | 5
- On the main desktop start by clicking Start.
Next click on Settings.
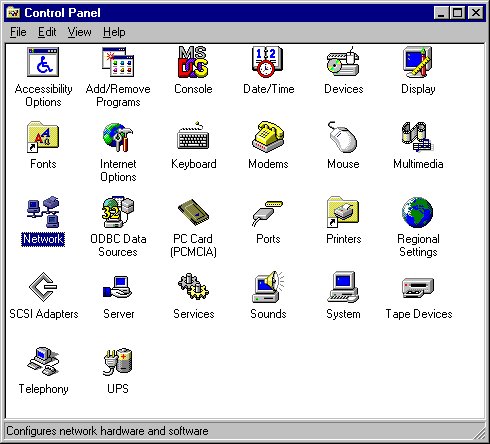
Click on Control Panel

- Double click with the left mouse button on the icon labeled Network

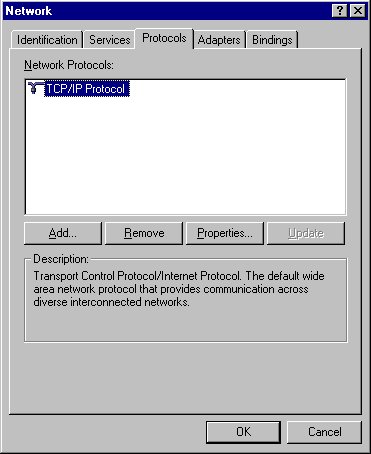
- Click once on the tab labeled Protocols at the top of the new window.
Next double click on the item listed as TCP/IP Protocol

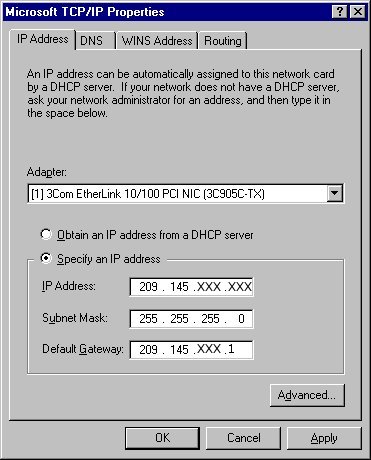
- Select the option labeled Specify an IP Address.
Next enter in your IP Address, Subnet Mask, and Gateway as given to you in your welcome kit

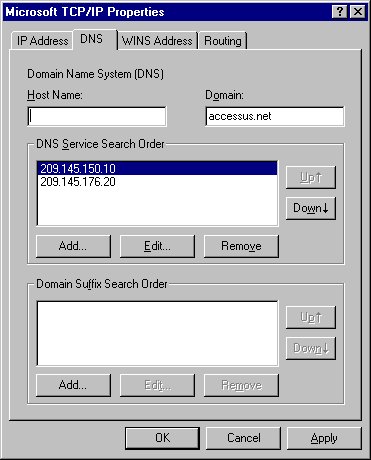
- Next click the tab labeled DNS at the top of the screen.
Fill in all the information as is listed below. NOTE: For the field labeled Host Name you can enter anything you wish. Most users enter in the name of their computer.
Finally click OK at the bottom of the screen.
When asked if you would like to save your changes click yes.
Click OK at the bottom of the next screen.
Finally when prompted to Reboot your computer click yes or reboot.
Your DSL connection should be working for you when your computer starts back up. Happy Surfing!
