Dial Setup – Windows NT
The following are step-by-step instructions for configuring Dial-Up Networking in Windows NT 4.0 for use with Access US If you have any questions or difficulties, please feel free to contact Technical Support.
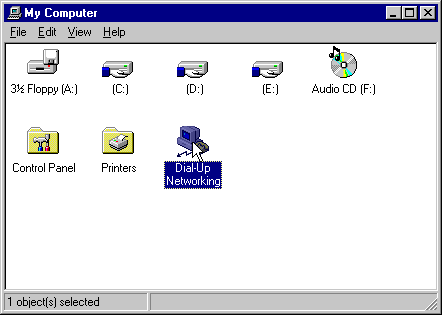
- Double-click on My Computer.

- Double-click on Dial-Up Networking.
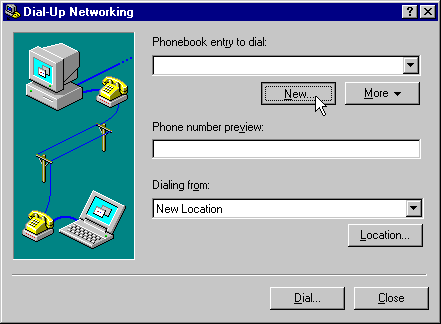
- Click on the New Button.
- Name the new phonebook entry AccessUS, and check the box I Know All About Phonebook Entries and Would Rather Edit the Properties Directly.
Then click Finish.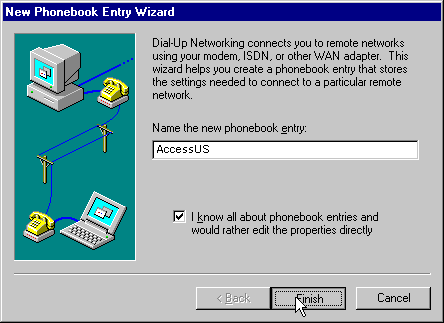
- In the Phone Number: field, enter your Local Access Number that was given to you. If you do not have that number, look up your access number on our Local Access Dialups webpage.
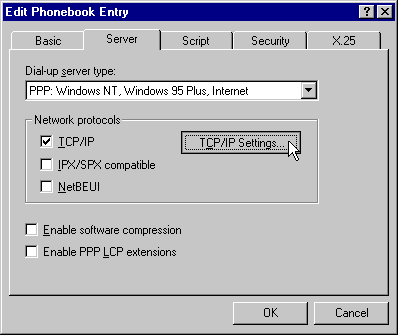
Then click the Server tab at the top.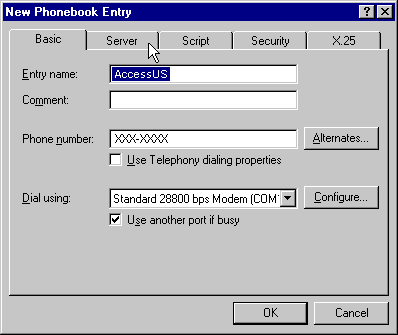
- Make sure the Dial-up Server Type: reads: “PPP: Windows NT, Windows 95 Plus, Internet”. Uncheck every item except for TCP/IP. Then click on the TCP/IP Settings button.
- Select Server Assigned IP Address.
Select Specify Name Server Addresses. Then insert into the Primary DNS field 209.145.150.10 and into the Secondary DNS field 209.145.176.20
Make sure Use IP Header Compression and Use Default Gateway on Remote Network at the bottom are both checked.
Click OK when all that information is entered.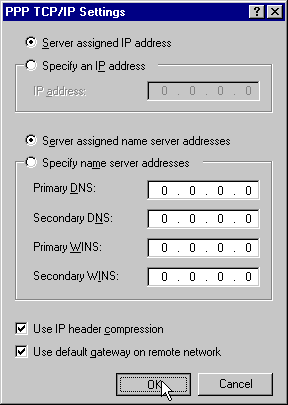
- Click on the Script tab.
Set it to the top option None.
Then click on the Security tab.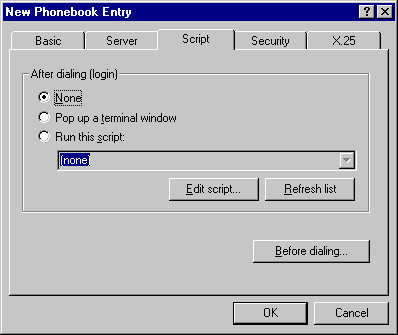
- Click on Accept Any Authentication Including Clear Text.
Then click on the X.25 tab.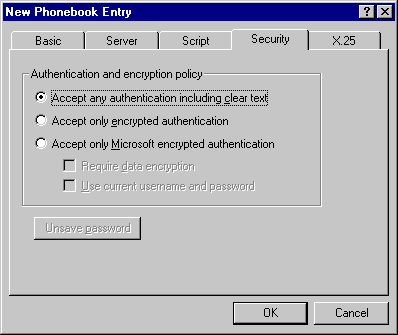
- Make sure Network: reads (none) and that all other fields are empty.
Click OK.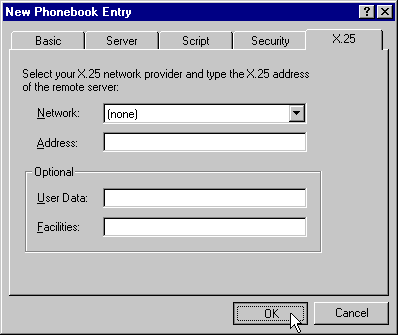
- Click Close.
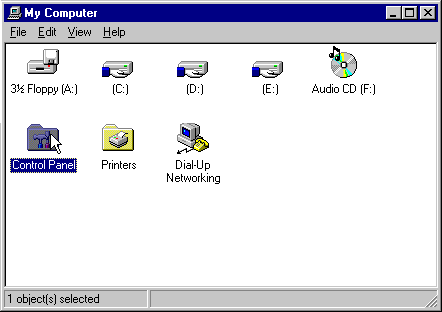
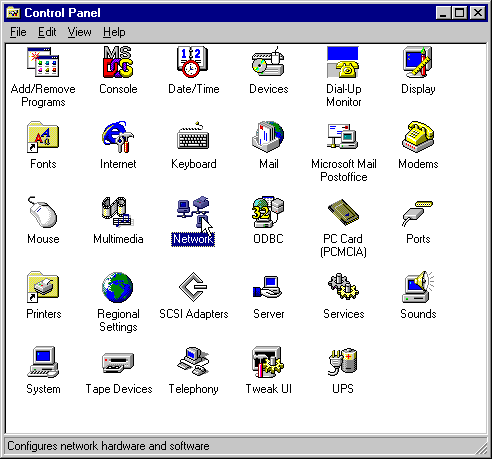
- Double-click on Control Panel.
- Double-click on Network.
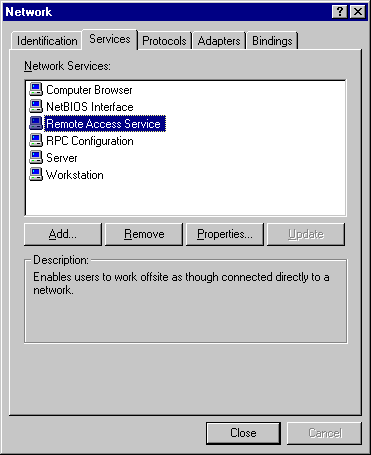
- Click on the Services tab at the top. If NetBIOS Interface and Remote Access Service are both installed, proceed to Step 16. Otherwise, proceed to Step 15.

- Click Add and Select NetBIOS Interface or Remote Access Service.
Click OK.
Repeat as necessary for those two services.
- Select Remote Access Service and click Properties.

- Click Configure at the bottom.
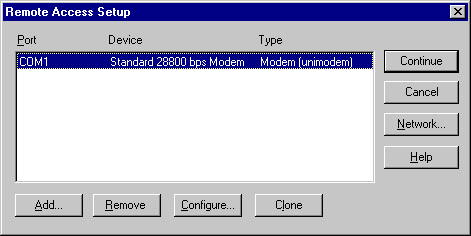
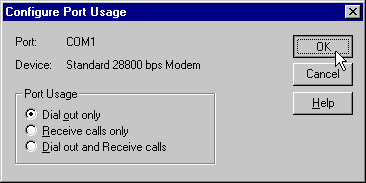
- Select Dial Out Only, and then click OK.
- Click Network on the right.

- Uncheck every option except for TCP/IP.
Then click OK.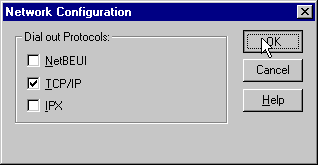
- Click Close at the bottom.
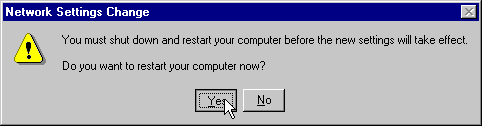
- If you are prompted to restart, click Yes.
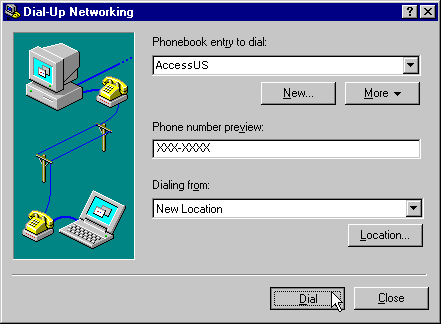
- Once the computer has restarted, double-click on My Computer.
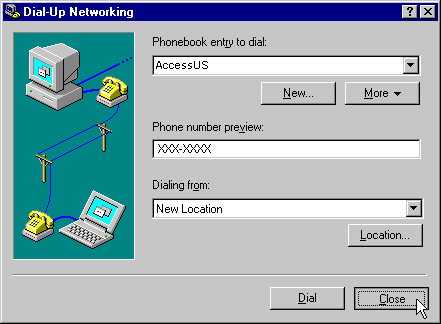
Double-click on Dial-Up Networking.
Click Dial.
- A Connect To window will appear.
Type in your username (your full e-mail address) in all lower case letters.
Then type in your password (it will appear as stars). Leave the Domain field empty.
Then click OK.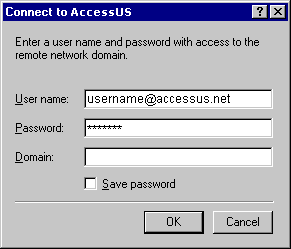
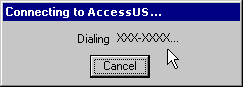
- The modem status will appear in the next box, proceeding through Initializing Modem, Dialing, Verifying Username and Password and Logging on to Network. At any time you can abort this procedure by pressing Cancel.